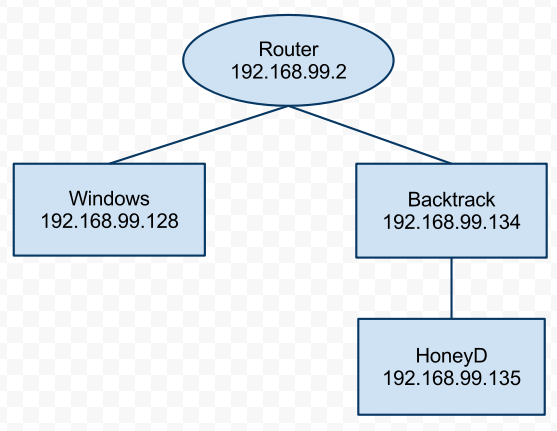
In the past two tutorials I’ve used DHCP to obtain IP’s for our honeypots running honeyd. Using dhcp is fine when testing honeyd and getting familiar with how honeyd works but a static IP may be more suitable for your environment. In my case I initially fooled around with honeyd via dhcp but when I wanted to implement in a more production environment I realized that static IP’s are more stable and less maintenance. In order to ping our honeypot the router / switch has to know what IP and MAC address our honeypot has so it can update it’s information, going through dhcp does this automatically. I’ll touch on how to add the static IP configuration later but first let’s go over our layout. I’ll be using the same simple layout as in the first tutorial as seen below.

There may need to be some clarification in that diagram. Backtrack is what is actually running honeyd, the address of 192.168.99.135 (labeled Honeyd) which is the honeypot honeyd created can be configured to emulate any operating system. Now for the honeyd config file.
create default
set default default tcp action block
set default default udp action block
set default default icmp action block

create windows
set windows personality "Microsoft Windows XP Professional SP1"
set windows default tcp action reset
add windows tcp port 135 open
add windows tcp port 139 open
add windows tcp port 445 open

set windows ethernet "00:00:24:ab:8c:12"

bind 192.168.99.135 windows
So the only real difference between dhcp and a static IP is the last line of the config. If you go back to the first tutorial you’ll notice the last line is the only difference as well. As a side I’ve used some configs that do not have the MAC address defined in their config but when I did not include the “set windows ethernet” line honeyd would complain and not start. So after you’ve set your config simply start honeyd.
After running honeyd you should get similar output to below.
Honeyd V1.5c Copyright (c) 2002-2007 Niels Provos
honeyd[27305]: started with -d -f honeyd.conf
Warning: Impossible SI range in Class fingerprint "IBM OS/400 V4R2M0"
Warning: Impossible SI range in Class fingerprint "Microsoft Windows NT 4.0 SP3"
honeyd[27305]: listening promiscuously on eth0: (arp or ip proto 47 or (udp and src port 67 and dst port 68) or (ip )) and not ether src 00:00:24:ca:6b:08
honeyd[27305]: Demoting process privileges to uid 65534, gid 65534
The difference in output between static and dynamic is that you’ll see the IP address your honeypot gets when using DHCP. With static IP configuration you’re not going to get that in your output because you already know the IP you’re using. So the output via DHCP will the lines below included.
honeyd[1870]: [eth0] trying DHCP
honeyd[1870]: Demoting process privileges to uid 65534, gid 65534
honeyd[1870]: [eth0] got DHCP offer: 192.168.99.135
So now you’ve take care of properly setting up honeyd to use a static IP address but now you’ll have to configure the network to use your static IP. In my enterprise production environment I’ve configured this via the DHCP server. I went into the DHCP server and made a static reservation. I also had to configure the switch I plugged my computer into and tell what VLAN that port needed to be assigned to. If you’re trying to get this set up in your work production environment you may have to work with your network team that manages DHCP / DNS / routers & switches. Networks may be managed differently so check with your local team on how you would get a static IP. Now if you’re doing this on a home network for testing then you probably have a wireless router such as Linksys. Inside all of these home wireless routers you can configure static IP’s. Each wireless router will have different steps for configuring static IP’s so refer to your manufacturers documentation on how to do that.
Next in this tutorial is what to run your honeypot / honeyd on? Laptop, desktop, server? These questions will be tackled in future articles.