Part 1 of this series focused on the basics of using a HTTP proxy to assess a web application. I encourage people to play around with HTTP proxies with a web application that they use frequently, it’s interesting to see what information is being passed between the client and server. This communication can sometimes include your private information so it’s good to understand how that particular web application is handling your information.
Part 2 in this series is going to focus on session ID analysis. If you are not familiar with session ID’s I’ll do a quick explanation. HTTP is a stateless protocol, so it’s equivalent to walkie talkies or CB radios. You’ll send a request and wait for a reply, you don’t have a constantly open communication line as you would with a phone. So in order to emulate this open communication the HTTP protocol uses session ID’s, commonly known as cookies. These cookies are simply agreements between you and the web application that you are who you claim to be. Once you have exchanged your cookie with the website you can then talk back and forth as long as the cookie is tied to your communication. So there’s the quick and dirty intro to session ID’s. So the next logical question is how does this session ID process work or even better how should it work? Let’s use a web mail application as an example:
- You login to your web mail account
- Your web mail provider sends you a “random” cookie that is tied to your login session
- Each time you click on a new message within your Inbox your cookie is sent along to validate who you claim to be, that way you’ll get your next message and not another person’s message.
These are the basic steps. The main thing to remember is that your login credentials are tied to the session ID / cookie. So the key to keeping your conversations private is protecting the session ID and making it hard to guess. Session ID’s are similar to passwords in that regard, you always want to keep them a secret and make them hard to guess. When Webscarab analyzes the session ID it only focuses on if the session is easy or hard to guess (aka randomness). So enough with the chit chat let’s see how Webscarab analyzes session ID’s.
Once again we’re going to be analyzing the Hacme Casino web application. The login page for this application can be seen in Figure 1.
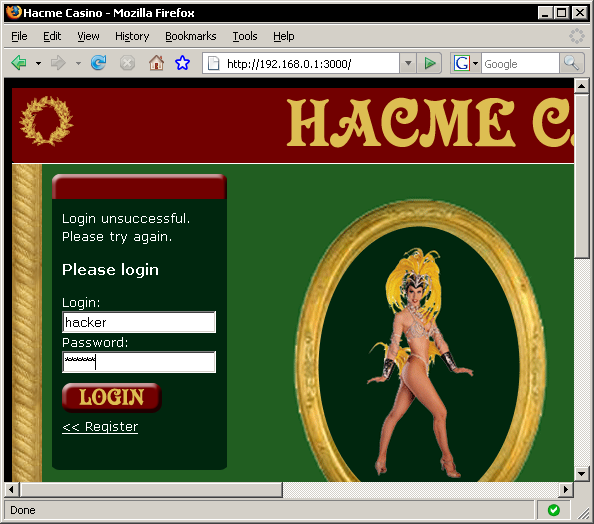
Figure 1: Hacme Casino login
So with Webscarab already running in the background I’ll go ahead and login into Hacme Casino and click on a few links. Navigating inside the application will generate requests and responses that we can later analyze. Now the login process should generate a session ID but there could be other session ID’s generated within the application that you may want to analyze as well. You could always keep an eye on the summary tab to see if you are capturing cookies. There are other ways to maintain state within a web application but cookies are the most common. When looking at the summary tab for the login process you can see that cookies are being set. This can be seen in the first conversation in the bottom row on Figure 2.
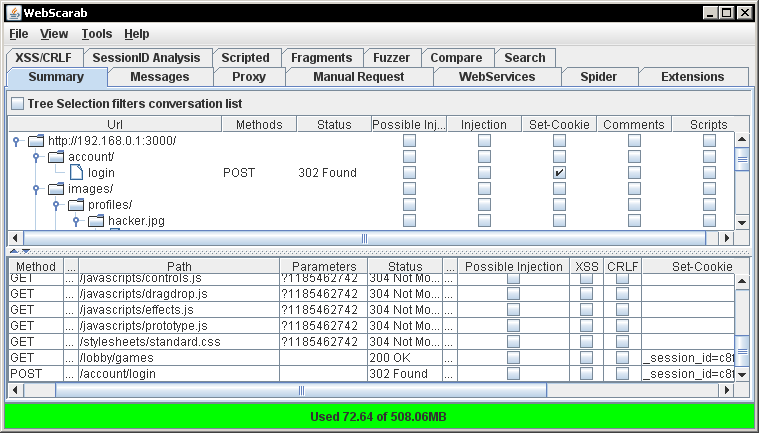
Figure 2: Login process for Hacme Casino
So the conversation with the path /account/login is setting a cookie, also the top pane has a check mark indicating that the login URL is setting a cookie as well. This is definitely a good target because we know the functionality of this session ID is to maintain my balance and gambling stats. Some session ID’s can be tough to figure out and sometimes it seems like developers set cookies for no reason. So now let’s walk through the steps to analyze the session ID associated with /account/login.
- Log out of the current session. I can’t stress this enough, the first time I was using this feature I bumbled around for a couple of hours trying to figure out why it wasn’t analyzing the sessions. Further down in this article I’ll show you a screen shot of what it looks like when you try and analyze the session you are currently logged into.
- Navigate to the Session ID Analysis tab » Collection tab within Webscarab. There you will see a drop down list labeled “Previous Requests”, here you can pick a conversation from your history of transactions within the web application to analyze. We already know that we want to analyze the /account/login conversation because we saw that it was setting cookies. If you were unsure which conversation used session ID’s you could click on the “Test” button to verify if session information existed. Figure 3 shows a screen shot of me choosing the /account/login conversation for analysis.
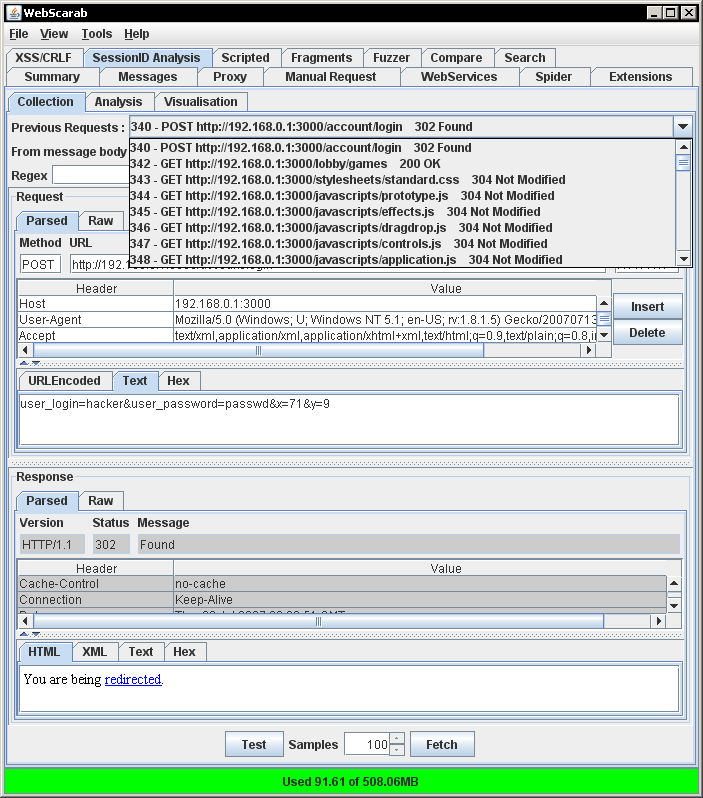
Figure 3: Choosing conversation in Collection tab
- After you have chosen your conversation for analysis you will then click on the “Fetch” button to start collecting session ID’s from the web server. The default number of session ID’s collected is set at 100 but you can choose more if you like. My background is math and science so I’m of the opinion that you can never have to many data points. Play with this number if you like, in my experience more samples will do a better job at producing trends and pointing out weaknesses in random number generation. The law of diminishing returns will eventually kick in though. So after you have clicked the “Fetch” button you will need to move over to the “Analysis” tab. When you first click on the “Analysis” tab it may seem like nothing is happening, this is because you need to select your session ID from the “Session Identifier” drop down list. This drop down list can be seen in Figure 4.
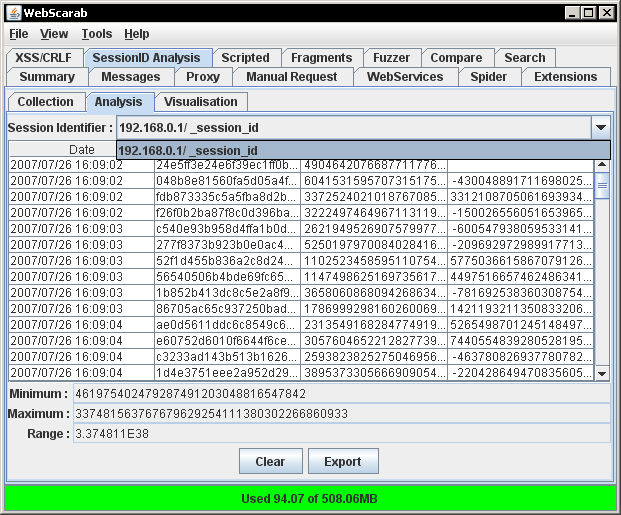
Figure 4: Choosing session in Analysis tab
Once you have selected your session that you are analyzing the table should begin to populate with the number of samples that you chose in the Collection tab. Webscarab takes the session ID’s found within the web application and converts them into numbers so that they can be easily parsed. These numbers are then compared to one another for predictability. Figure 5 below shows what happens when you try to analyze the current session, you’ll get zeros for both the Numeric value and the difference. This is because the session ID / cookie stays the same.
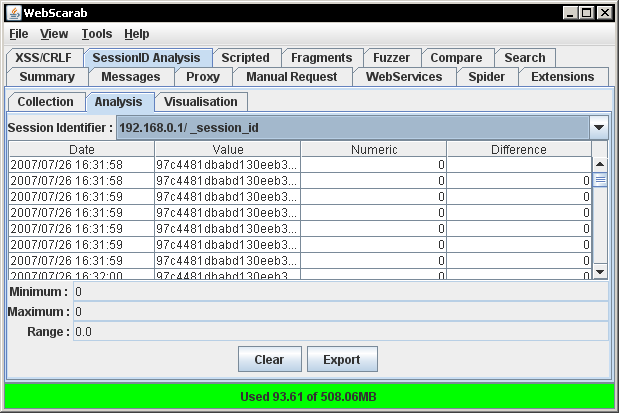
Figure 5: Analyzing current session
- The fourth and final step is neatest part of the session ID analysis functionality within Webscarab, the Visualization tab. This tab creates a graph using the numbers from the Analysis tab. This will give you a quick visual representation of how weak or strong the session ID’s are. The graphical analysis of the Hacme Casino session ID’s can be seen below in Figure 6.
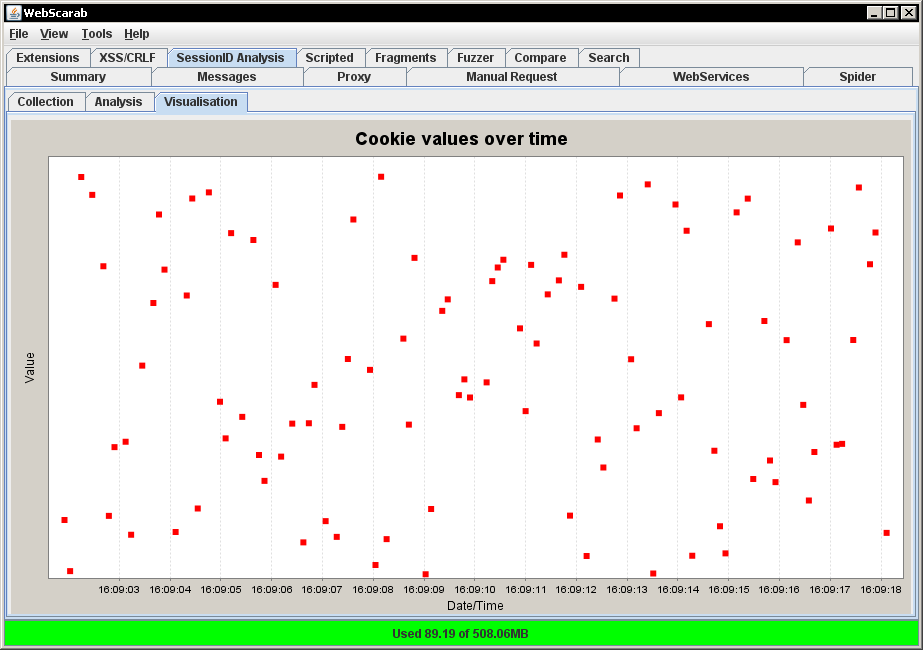
Figure 6: Cookies over time for Hacme Casino
It appears that the session ID’s created for Hacme Casino are random or at the very least not easy to guess. Your average malicious user is going to see that the session ID’s are going to be difficult to guess, so they’ll move on and try another vector to get inside the web application. A malicious user will be looking for easy access so they will be looking for session ID’s that are very easy to guess. Figure 7 shows an application that implements session ID’s that are very easy to guess.
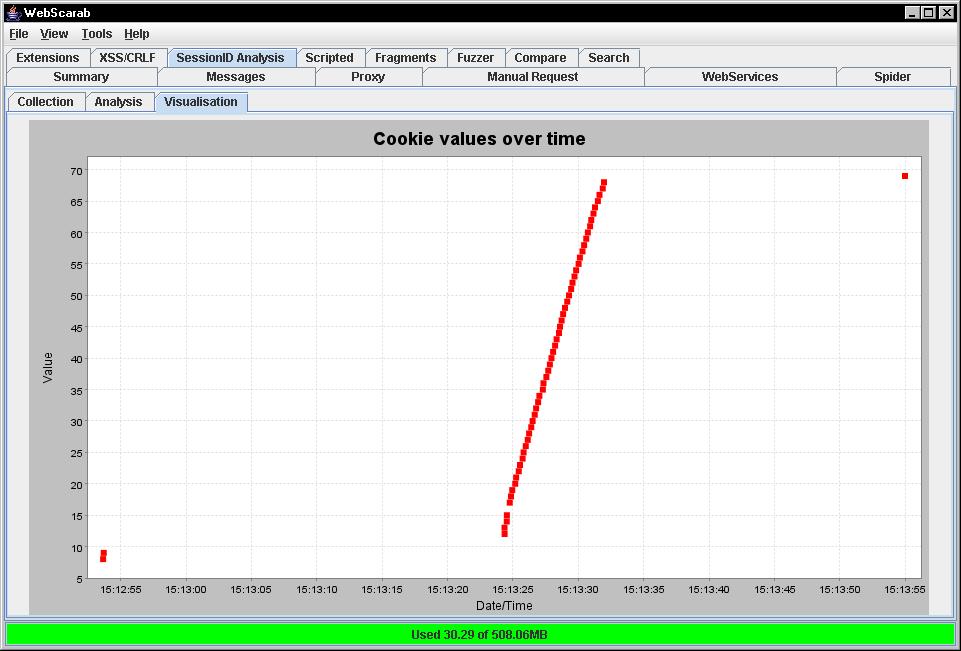
Figure 7: Weak cookies over time
This graph was not generated using Foundstone’s Hacme Casino but had a malicious user seen this type of graph it would be very easy for them to guess a session ID and essentially hijack that person’s Hacme Casino account. From the casino example you can see how dangerous weak session ID’s can be. Session ID’s are the “key” to someone’s account information. This is possible due to the stateless nature of HTTP. So a malicious user could hijack your account without ever knowing your username or password.
This concludes Part 2 of the Webscarab tutorial. If you have something to add or see an error please leave a comment or contact me. Part 3 is going to focus on the fuzzing functionality within Webscarab. Until then try the session ID functionality on a web application that you use often and see how weak or strong their session ID management is.