So the problem I have in my job and maybe others do as well is that when assessing a web application for vulnerabilities you want to throw automated tools at it first to get the low hanging fruit. So you get the results back and you have some good findings but you’re not exactly sure where that finding resides inside the application. Meaning first click here, then here, then here, and modify parameter X. It’s not crucial to know this because with burp or any decent web proxy we can replay that request to retrieve and prove the vulnerable results but when dealing with laymen and even developers you have to hand hold them through the exploitation process via the browser as much as possible hence the need to know where in the application the vulnerability exists.
In big applications simply knowing a what GET or POST request is vulnerable may not tell you where the vulnerability lies. Let’s say the scanner reports back that http://example.com/xskw/requestID?=blah is vulnerable, well this is a generic URL without much context so it’s not obvious where you would have to browse to stumble upon that request. It’s even worse for POST requests because going directly to the URL without the parameters can produce errors within the application.
Let’s walk through an example of using the burp intercept feature to find where scanner results are located. I’ll be using an intentionally vulnerable web application named Peruggia found within the owaspbwa project which is a great project to learn web app testing. So I ran the active scan against peruggia and got the following results.
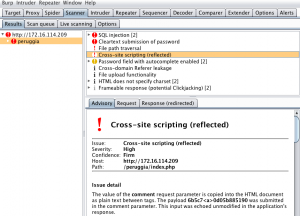
I’m going to focus on the highlighted cross site scripting vulnerability in the screen shot above. I picked this request for a number of reasons but first let’s take a look the details of the request below.
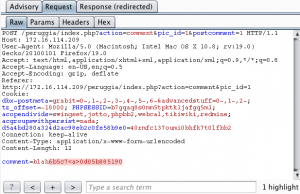
Here we see it’s a POST request and I wanted to focus on a POST request because some of the challenges faced with these requests. In the top third tab we see the response was redirected which means we’ll get a 302 status code. If you were to copy and paste the URL into the browser and make that request you’ll be redirected to the home page. This is the nature of POST requests we can’t just put the URL into the address bar and be take to that location. Because of this it can be hard to determine where in the application the vulnerability exists. Especially for XSS (cross site scripting) vulnerabilities I like to obtain screen shots of the alert box to prove to the customer that I was able to exploit the vulnerability. With a GET request this is easier but POST requests add a level of difficulty.
Let’s walk through an example to understand the challenges. I’ll be starting out on the about page of the Peruggia application. Next I’ll paste the URL from the XSS finding into the address bar.
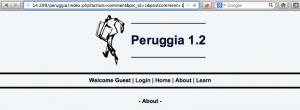
After I enter this request I get redirected to the home page.
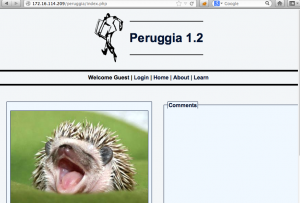
This is also reflected in burp where we see the 302 redirect status code that sends us back to the home page.

So the challenge is to find that “comment” parameter that burp flagged as vulnerable but without a simple GET request this can be difficult. I didn’t pick the greatest example because the “comment” parameter shouldn’t be that hard to find in this application because it’s fairly small and the parameter is actually providing some context, adding a comment, which doesn’t always happen. So for this example let’s ignore the big comment box on the home page and pretend we didn’t see that.
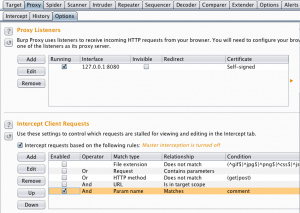
We’ll now set up a rule inside the proxy intercept to alert us when we stumble across the vulnerable “comment” parameter. Let me explain the term stumble for a second. When I get a result back from a scanner and I’m not sure where it’s located inside the application I’ll typically start walking the application and monitor my proxy history to see if that parameter was passed within a request. This can be a pain in the butt so setting up a proxy intercept rule can help automate the process. The rule is somewhat counter intuitive because we’ll leave the intercept on the entire time and let it catch when it sees our parameter. In this case we’ll disable the default file extension match rule and add our new rule to look for the parameter in question. Below is the rule I setup to catch the vulnerable parameter “comment”.
Now the next thing is to start browsing / walking the application and the proxy intercept will automatically alert you when you come across the vulnerable parameter. So while walking the application I decide to post a comment on a picture to ensure I’m touching every functionality of the application. My intercept is on with my new rule waiting for it to flag the vulnerable parameter.
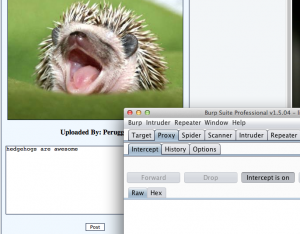
After I make this request my proxy starts blinking and alerting me to the fact that I’ve come across the “comment” parameter.
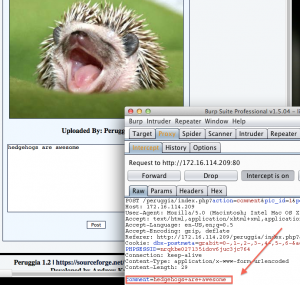
Unfortunately for large applications it may take some time before you stumble upon the proper vulnerable parameter but hopefully this will help you out when trying to pinpoint the location of automated findings. Of course once we’ve found the vulnerable parameter that the automated scanner has found we’ll want to capture a screenshot of the exploit and this case we’ll need to document that we’re abe to execute javascript inside the application. So now I’ll capture that POST request again and insert the classic javascript alert message.

And now the alert message proving to the application owner’s, developer’s, and customer’s that executing javascript is possible.

XSS FTW. Hopefully my little small tip will help you when trying to hunt down where in the application an automated finding resides. Happy bug hunting.